
Believe it or not, but there are many factors that come into play that help to create the best pictures of the nails you do. Taking a great picture can help to display your work more beautifully and help catch the eye of people scrolling through your socialmedia. If you are a "Do it Yourselfer" then this may not be high on your list of priorities but if you are a professional nail technician, taking great pictures can increase your business quickly.
The first thing to consider is, what are you using to take the pictures? Most cell phones have great cameras so there is no need to go out and purchase an expensive camera. I have an iPhone 12 Pro Max and the camera on it is amazing!! There are a lot of edit options on it to brighten, sharpen, add vibrancy, etc to your photos. But you don't need a brand new cell phone either.
Probably one of the most important things to consider is your lighting. Natural lighting can be used if there is a lot of sunlight coming in but, most of the time, the camera won't produce a picture as you see it with the naked eye. If you plan to purchase any additional lighting, purchase something that will allow you to use Daylight light bulbs. People think that Halogen bulbs work best because they are so bright but they actually don't. Halogen lights cause too many shadows and sometimes unexplained lines in the photos.
Here is a nail photo taken by @katten.nails with perfect lighting:
I am not saying that it is a must to do all of these things before posting pictures. It is completely up to you but I wanted to offer some advice if you did want to know how to produce prettier, more clear pictures.

It does make for prettier pictures if the skin surrounding the lovely nail art you just did is free of any polish. You can help to avoid this by placing Clear Jelly Stamper's "Protect" on the skin around the perimeter of the nail as shown here by @copycatclaws:
This will cut down on the time it takes to remove any excess CjS nail stamping polish that might be on the skin. Once you complete your designs and top coat them with our "Smear Not" top coat, you can peel off the "Protect" and voila!! If there is still some polish left on the skin, you can use our "Pink Short Bristle Clean-Up Brush" by dipping it into an acetone free polish remover and gently brushing the excess polish away.


If you are finishing your designs with a gel top coat, once the gel is cured, you can simply remove all of the excess CjS nail stamping polish with a wipe soaked with a nail polish remover & our KoKo & Claire Cleanse.
The best way to finish off the nails to prep them for the perfect picture, get
your model to wash their hands to remove any dust or dirt and then rub cuticle oil into every finger. Follow up with a dry wipe and remove any extra
oil sitting in the cuticle area or sides of the nails.
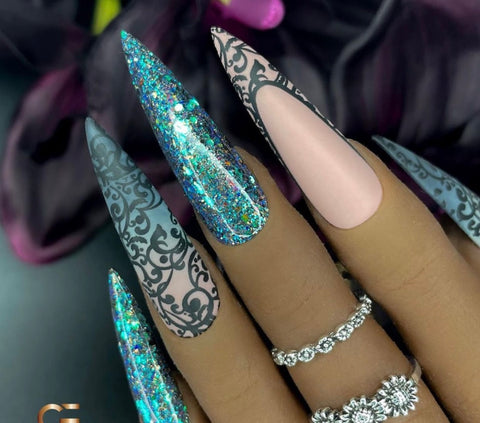
Dressing the hand up with jewellry just adds a little bit more fun to the presentation.
If you don't have human hands to work on, you have the option of purchasing life-like hands and removable tips like our KoKo & Claire Practice hands:


Dressing the hand up with jewellry just adds a little bit more fun to the presentation.
I hope this blog has given you some great advice to help you with your picture taking and if you have any more questions, please feel free to email me with those questions to education@clearjellystamper.com . Thank you for your continued support. Your business is greatly appreciated!! Tag us on instagram for a chance to get featured on our page @clearjellystamper 💖
📸💅🏽Happy Stamping & picture taking my friends!!💅🏽📸
📸💅🏽Happy Stamping & picture taking my friends!!💅🏽📸